安装与升级
安装
sh <(curl https://cyberpanel.net/install.sh || wget -O - https://cyberpanel.net/install.sh)
升级
sh <(curl https://raw.githubusercontent.com/usmannasir/cyberpanel/stable/preUpgrade.sh || wget -O - https://raw.githubusercontent.com/usmannasir/cyberpanel/stable/preUpgrade.sh)
安装
                CyberPanel Installer v2.03

  1. Install CyberPanel.

  2. Addons and Miscellaneous

  3. Exit.


  Please enter the number[1-3]: 1
1.安装
2.安装组件
3.退出
                CyberPanel Installer v2.03

  RAM check : 1668/7810MB (21.36%)

  Disk check : 168/1007GB (18%) (Minimal 10GB free space)

  1. Install CyberPanel with OpenLiteSpeed.

  2. Install Cyberpanel with LiteSpeed Enterprise.

  3. Exit.


  Please enter the number[1-3]:
1.安装Openlitespeed (免费)
2.安装Litespeed Enterprise (收费,但是2G内存以下机器有免费许可证)
3.退出
Please note that your server has 7810 MB RAM
If you are using Free Start license, It will not start due to 2GB RAM limit.

If you do not have any license, you can also use trial license (if server has not used trial license before), type TRIAL

Please input your serial number for LiteSpeed WebServer Enterprise:
如果选择2,会让你输入许可证
在https://store.litespeedtech.com/处购买,你要买收费版的话请选择LiteSpeed Web Server (CyberPanel Bundle)不然无法和CyberPanel配套使用
The serial number you input is: xxxxxxx
Please verify it is correct. [y/N]y

License key set...

Would you like use Redis Mass Hosting?
Please type Yes or No (with capital Y, default No):
Redis Mass Hosting Redis可在后端动态生成所有配置。创建新网站或更改PHP版本时,无需重新启动Web服务器。
Install Full service for CyberPanel? This will include PowerDNS, Postfix and Pure-FTPd.

Full installation [Y/n]:
完全安装,包含PowerDNS(DNS服务器), Postfix(邮局服务)和Pure-FTPd(FTP服务器)
Install Postfix? [Y/n]: n

Install PowerDNS? [Y/n]: n

Install PureFTPd? [Y/n]: n
若选择N可以自定义安装,不过安装完成后没法继续安装未安装的组件
Do you want to setup Remote MySQL? (This will skip installation of local MySQL)

(Default = No) Remote MySQL [y/N]:
这里选y为配置远程远程数据库,即不在本地安装,建议选N
Press Enter key to continue with latest version or Enter specific version such as: 1.9.4 , 2.0.1 , 2.0.2 ...etc
输入要安装的版本或者回车直接安装最新版本
然后就是漫长的安装过程
之后访问https://IP:8090登入到控制面板
有中文,但是一言难尽
配置
网站管理
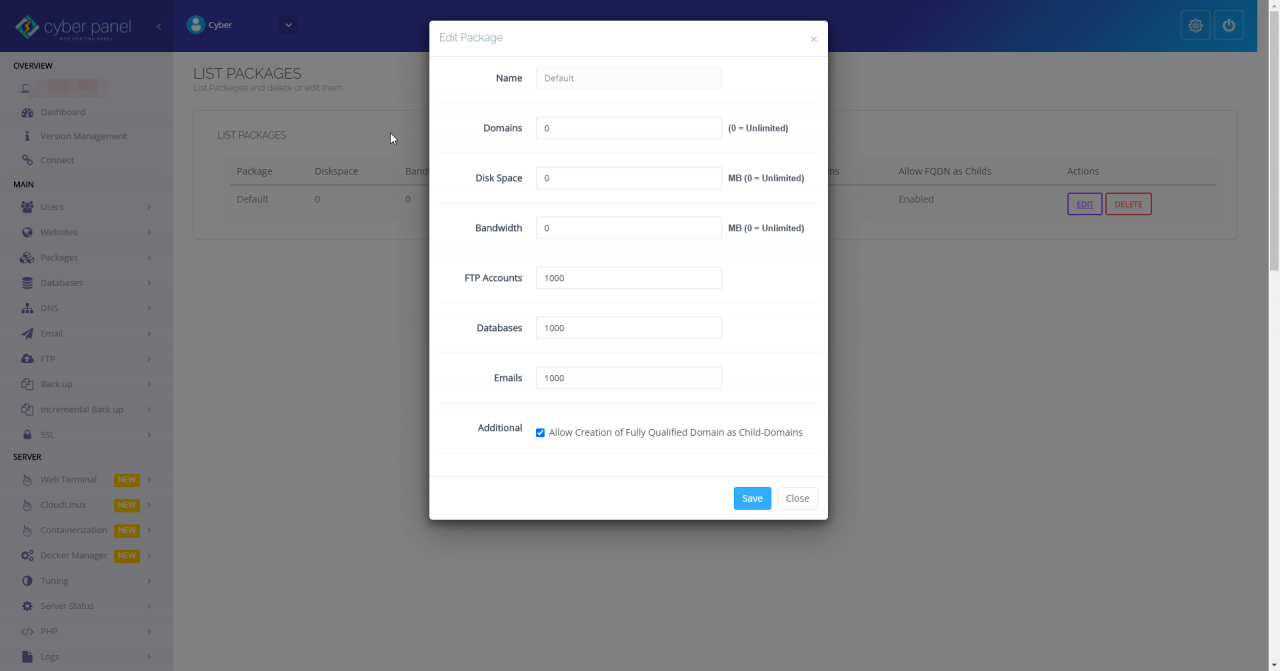
建议先到PackAge-List Package修改下套餐
然后到Website - Create Website新建网站
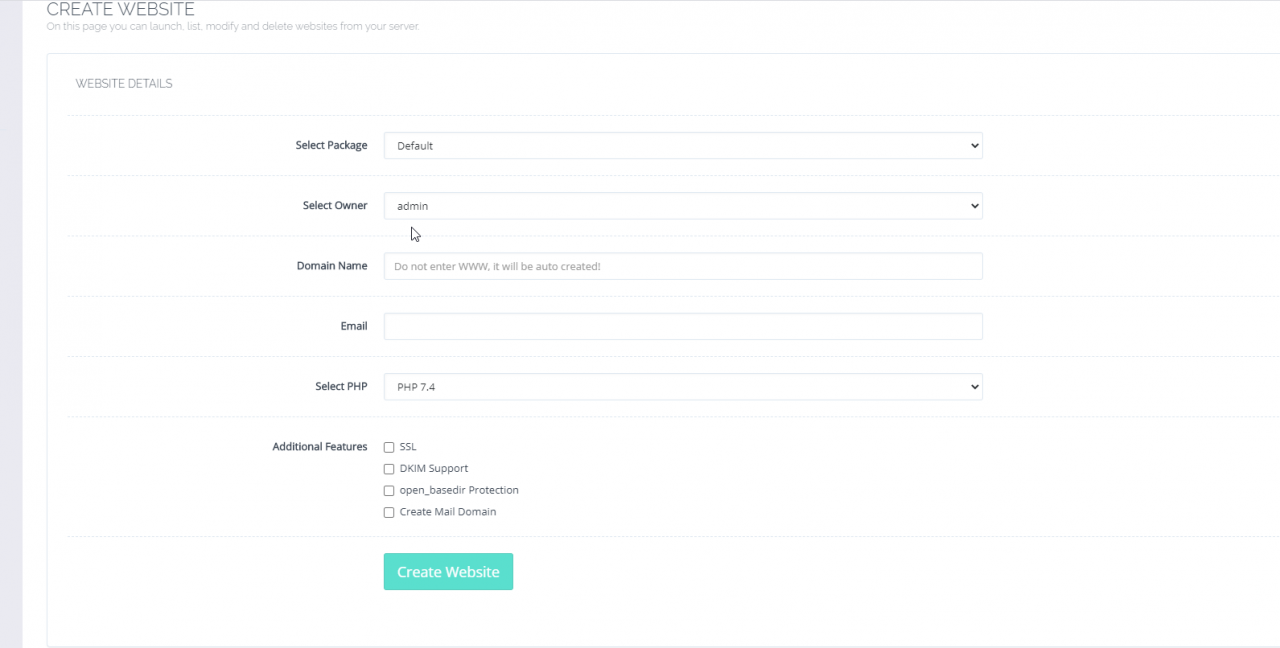
ssl 申请SSL,请在创建前提前配置解析,否则签出来的是自签名
open_basedir Protection 防跨站
DKIM 域名密钥识别邮件 邮件系统用的
Create Mail Domain 创建邮件域名 为 mail.你的域名
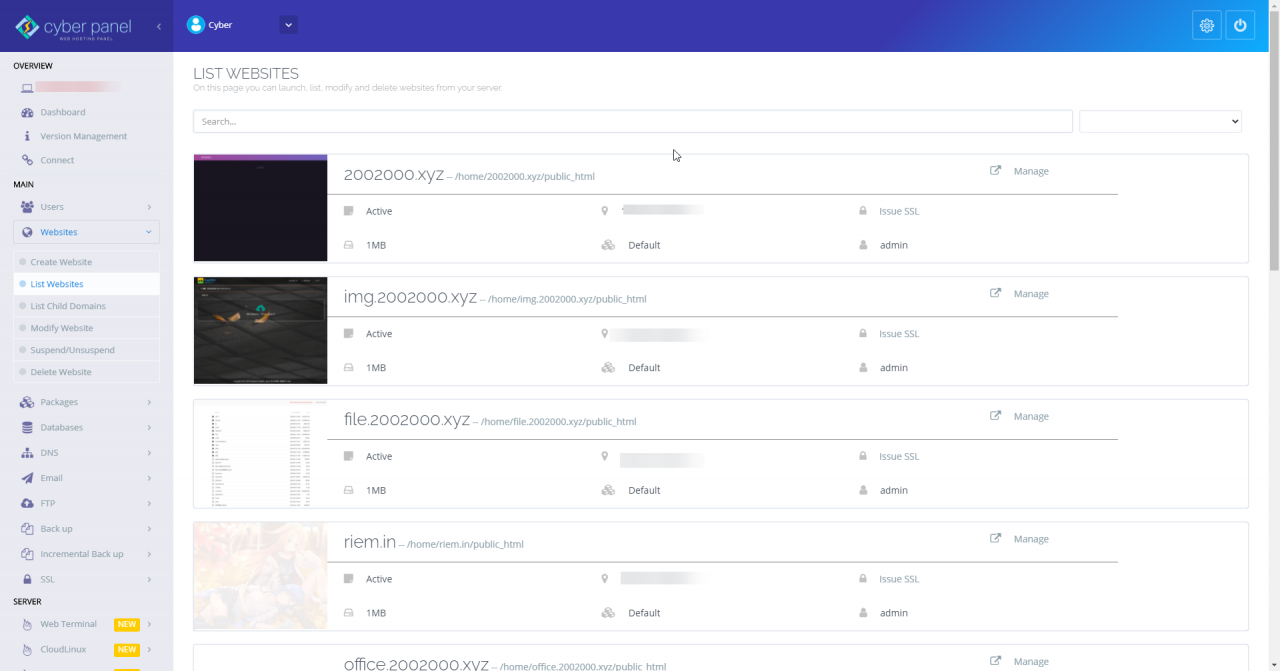
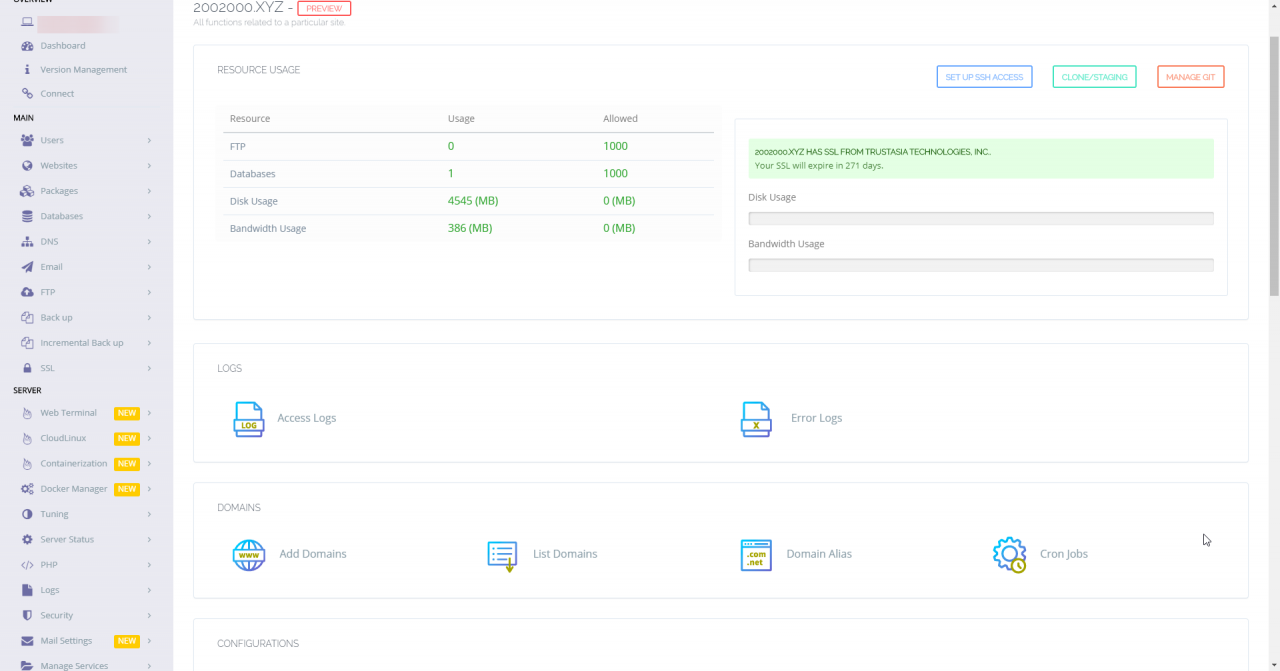
功能还是比较丰富的,就调经常用到的说了
Set up ssh access 建立SSH用户
Manage Git创建Git库
PREVIEW 预览
可以在为进行解析的情况下就进行预览
APPLICATION INSTALLER 处可以快速安装一些程序(虽然很少)
Rewrite Rules 重写规则
Select Template 中包含了俩常见的,HTTPS的跳转和WWW的跳转
vHost Conf 为虚拟主机的配置文件
文件管理
点击域名后的路径或者File Manager即可进入
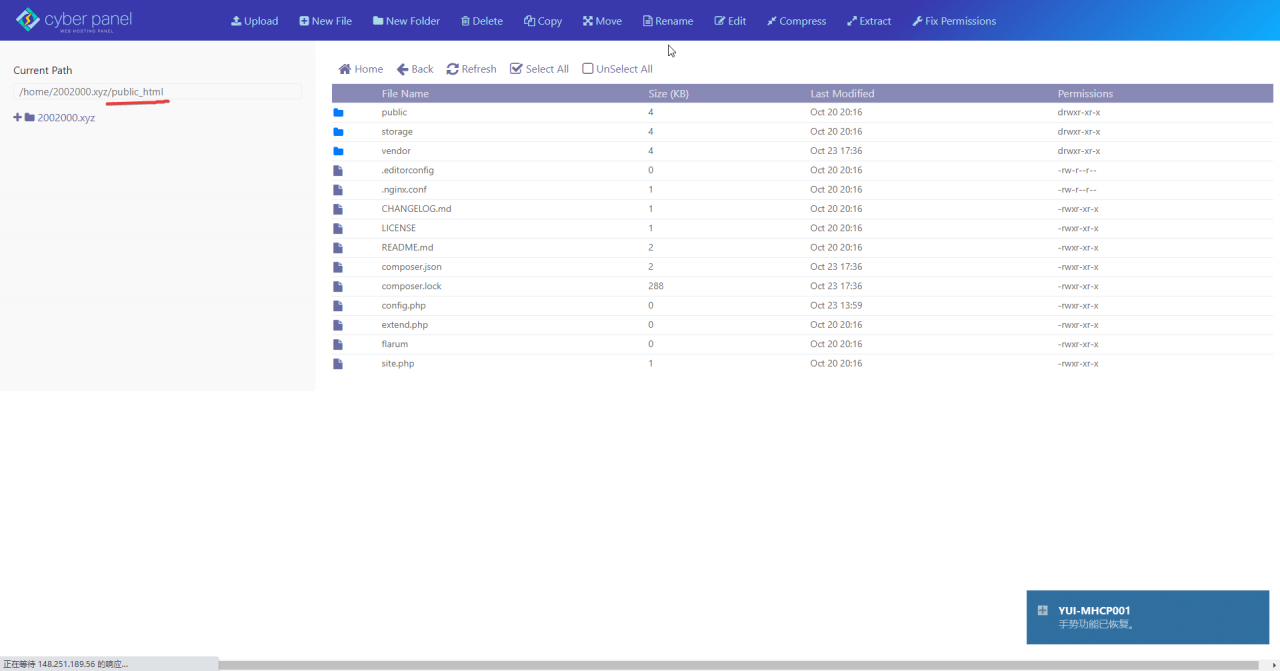
注意将网站文件放在public_html目录下
如果出现403错误,可尝试点击Fix Permission即可修复权限问题
数据库
点击 Databases - Create Database
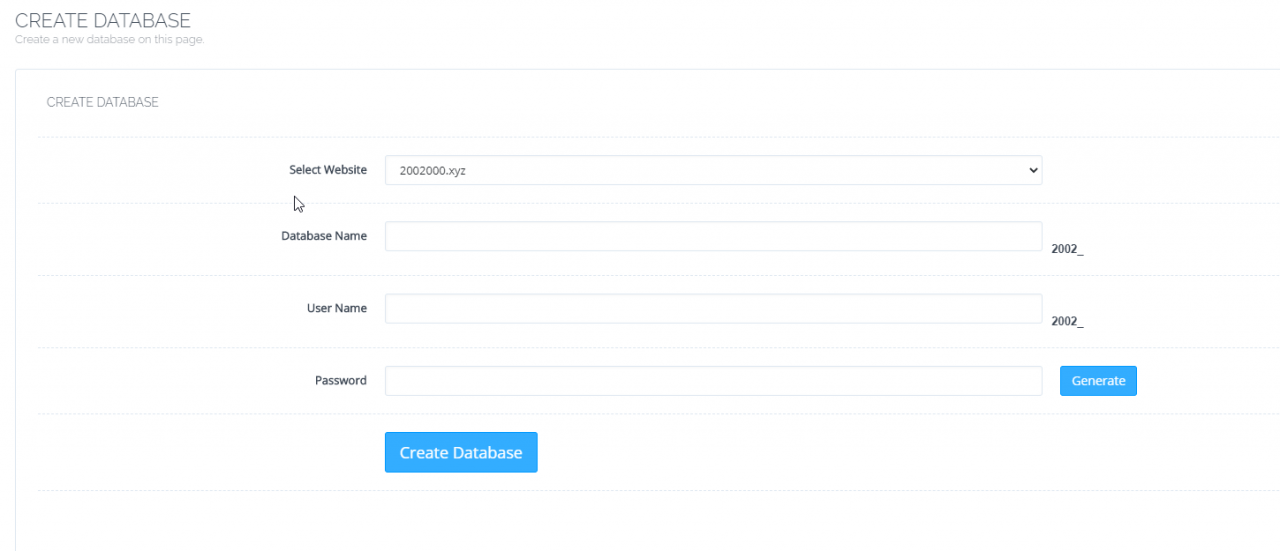
选择域名,输入信息即可
注意,如果你删除对应的网站,数据库也会被删除
别问,问就是血的教训
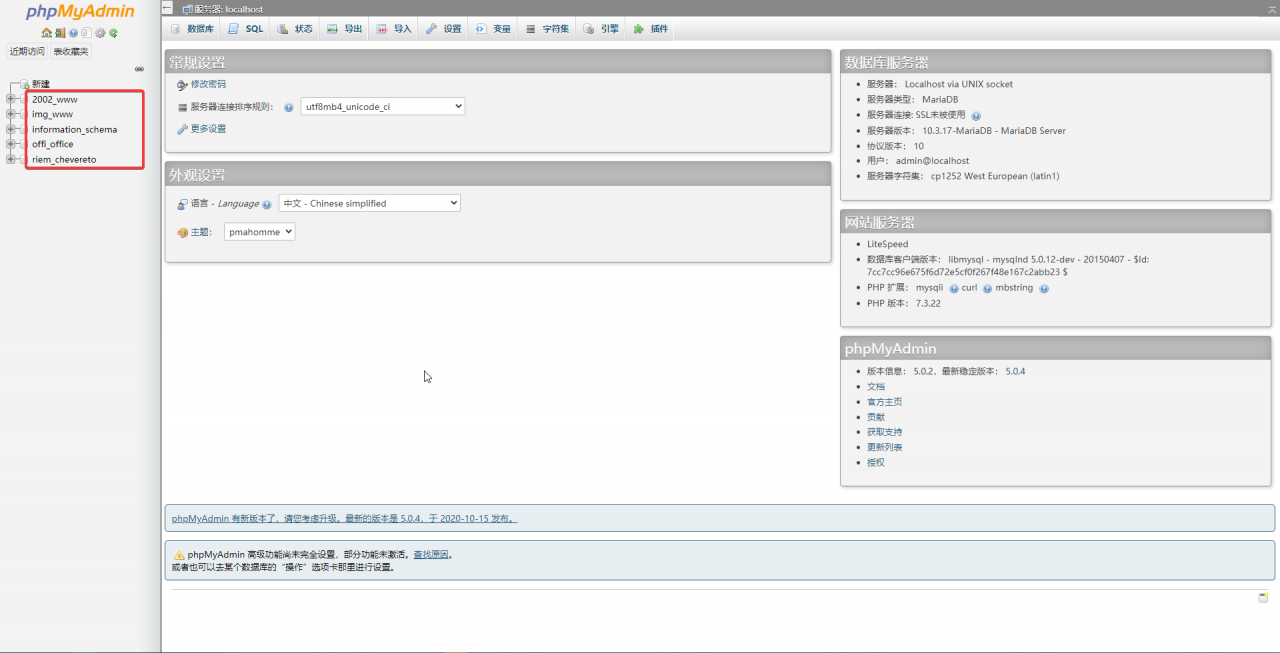
Databases - PHPMYADMIN 即可登入到PHPMYADMIN
可以一键登入,而且该用户的所有数据库都可以访问
这让我想起了当年被宝塔支配的恐惧

备份
支持普通备份(Back up)和增量备份(Incremental Back Up)
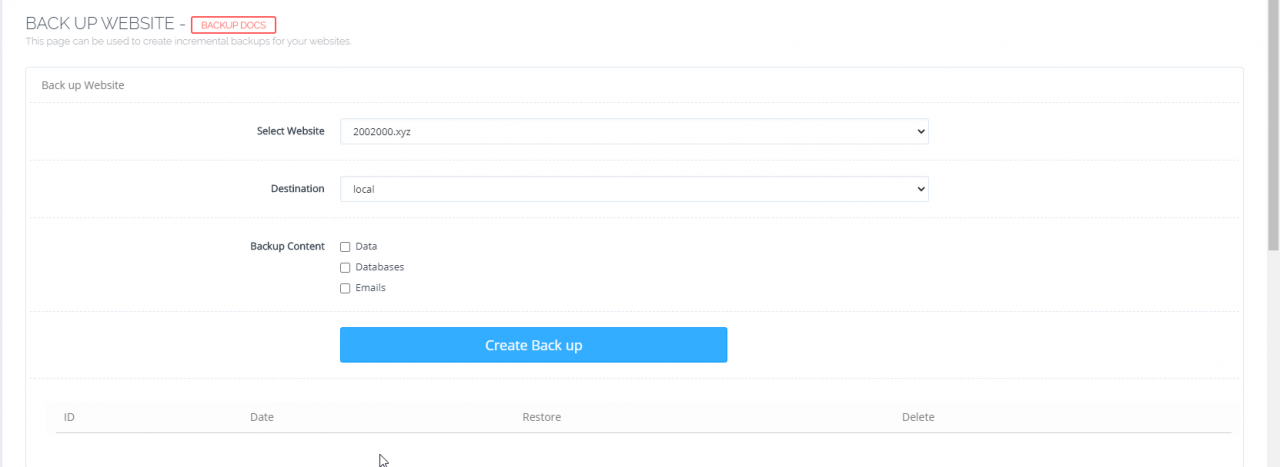
选择网站后选择位置(远程地址在SET UP BACK UP DESTINATIONS配置或者Setup Google Drive设置谷歌网盘),
之后选择要备份的内容即可
Litespeed配置
首先在防火墙中打开7080端口
然后访问HTTPS://IP:7080使用WebAdmin console username & Password登入
首先设置下验证码防护
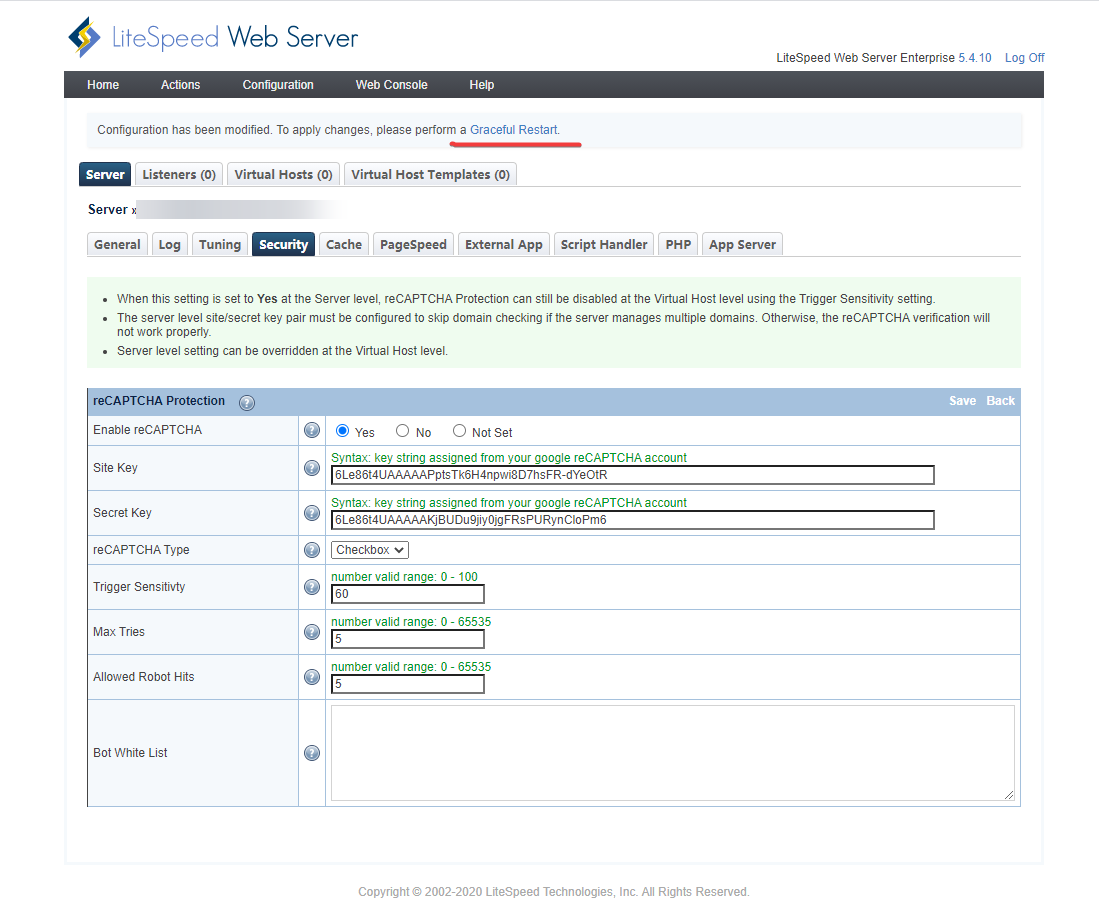
在Configuration - Server - Security - reCAPTCHA Protection
reCAPTCHA Type 为reCAPTCHA的类型,分为Checkbox(复选框)和Invisible(隐形)
Trigger Sensitivty是值得风险指数,数值是从0(总是关闭)-100(总是开启)根据情况自行设置
谷歌验证码Key申请地址:https://www.google.com/recaptcha/about/
如果你懒得申请可以用咱的
Site Key:6Le86t4UAAAAAPptsTk6H4npwi8D7hsFR-dYeOtR
Secret Key:6Le86t4UAAAAAKjBUDu9jiy0jgFRsPURynCloPm6
类型是Checkbox(复选框)
连接数限制:
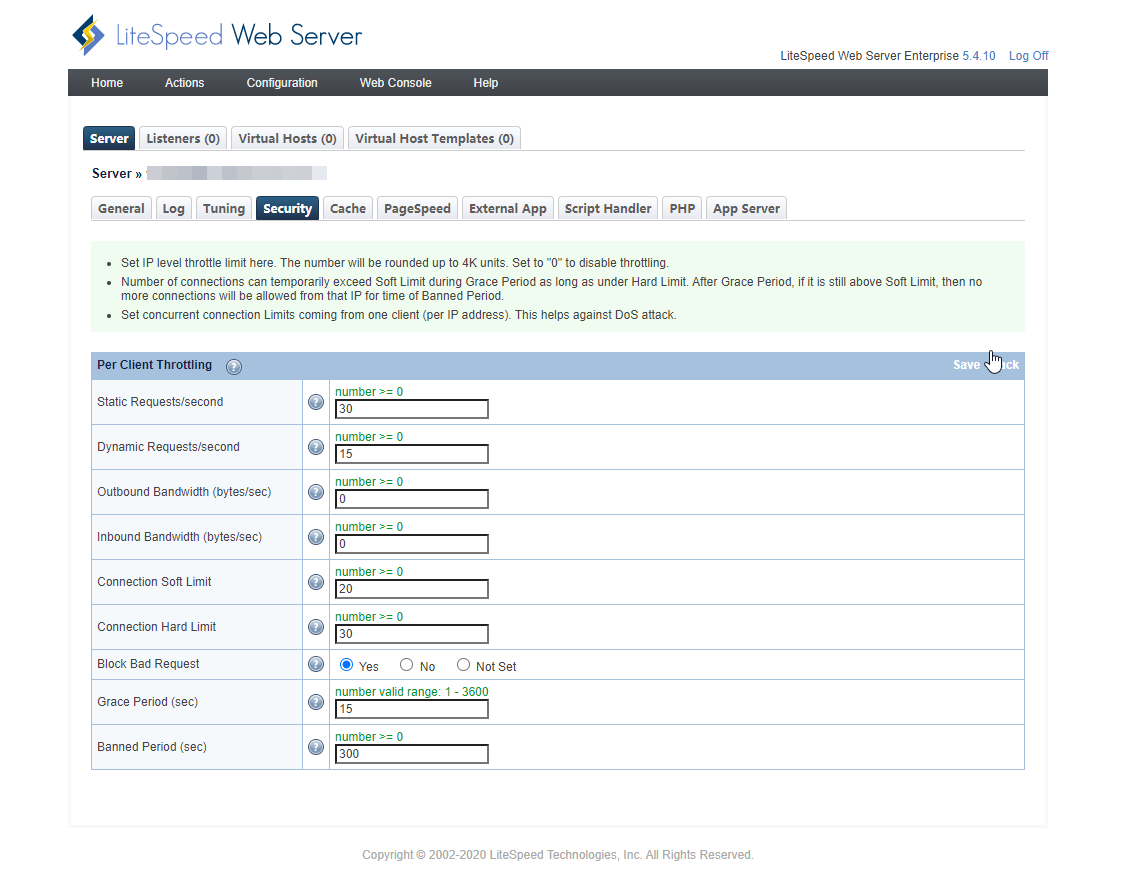
在Configuration - Server - Security - Per Client Throttling
这个有助于防御DoS攻击
数值根据自己需要填,懒人就比这建议数值填吧,
我懒得写了(run
其他的自己看着填吧~
OLS有中文,自己比着看


暂无评论